This tutorial doesn’t explain how to create a new order process.
The goal is to explain possible steps after the order process creation.
The GUI
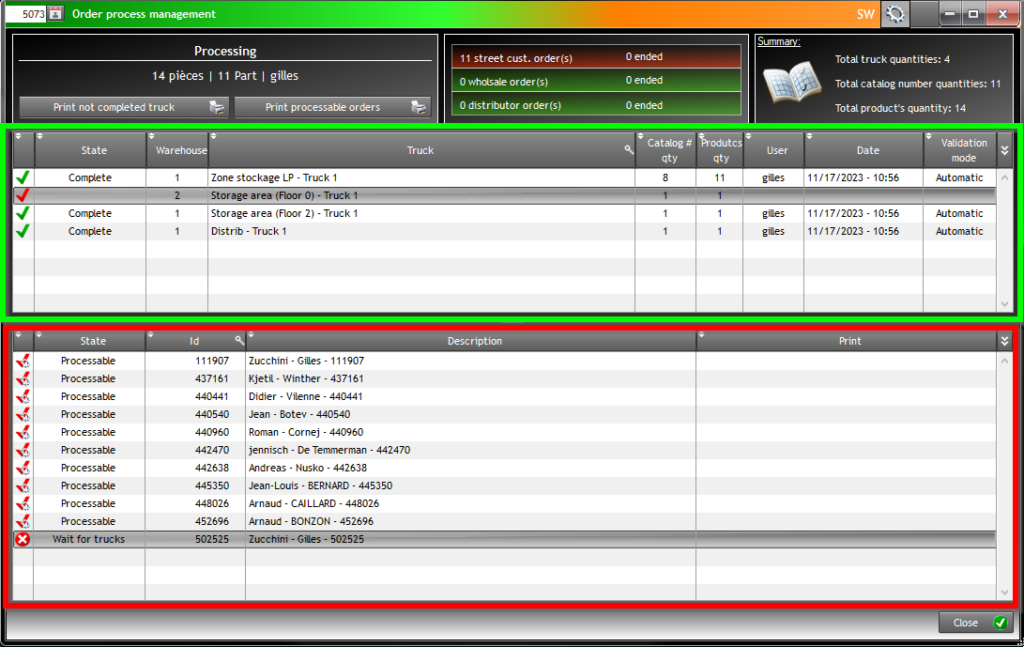
Once the order process is created, you’ll have access to that window:

The green zone is concerning TRUCKS.
The red zone is concerning ORDERS.
Before November 2023, you’ll have to validate all trucks before starting to pack orders. Now, with that new system, you can start packing order when concerning trucks are “complete”. In the example above, you can see that one truck is not entered yet in the interface, but there’s a lot of “processable” orders.
There’s also one order that “wait for trucks”.
Automatic trucks VERSUS manual trucks
Until now, only manual truck were possible. Now, you can right click on some trucks (all If you want) to “automaticaliy” validate them.
In that case, when orders with items in these trucks will be printed, instead of mentionning “slot in trucks”, their real slot will be printed.
That means the picking will occurs directly in the shelves, to avoir the “double picking”.
Steps to follow
First, you have to determinate what trucks should be automatic : right click on them => automatic validation. These truck will be immediatly set to “complete”.
Next, you should clic the button “print not completed truck”. All trucks that are not “complete” will be printed. You can give that to the stock boy.
The button “print processable orders” let you “print” orders that are “processable”. You have to use this to give orders to the stock boy.
Each time a truck is complete, there’s potentially “new” order processable.
A tips that can be usefull: mouse over the order description to see what trucks are needed to process that order.